Green Bay Plumbing
  • Home
  • Plumbing Services
    • Water Leaks
    • Faucet Repair and Replacement
    • Water and Drain Line Repairs
    • Water Heaters >
      • Gas Hot Water Heaters
      • Electric Hot Water Heaters
      • Tankless Hot Water Heaters
    • Sump Pumps
    • Water Softener Installation and Service
    • Water and Sewer Service Hookups and Repairs
    • Sinks
    • Toilets / Urinals
    • Disposals
    • Valves and Shut Offs
    • Grease Traps
    • Backflow Preventers
    • Drinking Water Purification
    • Reverse Osmosis Systems
  • Plumbing Products
  • Emergency Plumbers
  • Testimonials
  • Plumbers
  • How To
  • FAQ
  • Contact Us

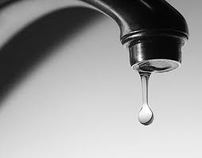
Fixing a Leaky Faucet

Picture
Replacing A Gasket

Turn the water supply off to the sink and let your family/roommates know not to use it. Usually the water supply knob is either under the sink or on a pipe connected between the sink and the toilet.

Place the crescent wrench on the head of the faucet (the last piece where the water comes out), loosen and remove. You may be able to do this by hand.

Look at either the inside of the freshly removed piece or where the piece was attached for the gasket. The gasket looks like a flattened rubber doughnut. Remove it.

Inspect the faucet area where the faucet head was connected for grit or grime. Do the same for the faucet head. Clean the surfaces with a toothbrush or other cleaning supplies.

Take the old gasket to the hardware store and match it up to a new gasket and purchase. Replace the gasket by placing it to the faucet head. Make sure it is flat against the head and not buckled.

Hand screw the head back into the faucet, taking extreme care into making sure that the gasket isn't caught or wedged in the grooves. Tighten with the crescent wrench until snug.

Turn the water supply back on and test by turning the faucet on for 30 seconds and then off. Wipe off residual water from the head and observe for a minute if there is a drip. If there is not, you have succeeded!


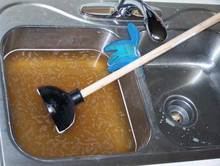
Unclogging A Sink

Picture
Put on rubber gloves and remove as much water from the area as possible by dipping it out with a cup. Soak up the rest of the water with an absorbent rag and squeeze the water into a bucket. Repeat until most of the water is gone.

Inspect the cross hairs in the drain. Remove any hair or other debris that may be caught there. This can be cleared away by using tweezers or needle-nosed pliers.

Insert a long piece of wire, with a hook bent at one end, into the drain. Pull out the debris with this and toss the debris into the trash.

Cover up the air holes in the sink. Either enlist a friend to hold a wet wash cloth over the drainage holes or cover them with a piece of duct tape.

Apply a thin layer of petroleum jelly over the bottom lip of a plunger. This gives you a tighter seal over the drain hole.

Place the lip of the plunger so it completely covers the drain hole.

Fill the sink with hot water until it covers the rubber part of the plunger.

Thrust the plunger up and down in a quick motion for about two minutes.

Remove the plunger to test the drain. If the water does not flow out, remove the water and proceed to the next step.

Place a bucket under the P-trap.

Remove the nuts that hold the P-trap in place with a pipe wrench. Place a rag between the teeth of the pipe wrench and your pipe to keep from scratching the finish.

Clean out the P-trap by flushing it out with clean running water.

Install the P-trap back in place with a pipe wrench. Use a rag as directed in step 11.

Run hot water into the sink to test if the water drains away and to check for leaks. If this does not solve the problem, proceed to the next step.

Remove the P-trap again and insert the head of a plumbing snake, or auger, into the drain. After the head is in the drain about 3 inches, turn the handle in a clockwise direction until it meets resistance.

Reverse the direction of the auger by turning the handle in a counterclockwise direction 1 or 2 inches.

Repeat the forward, backward motion of the auger until the drain is clear.

Pull the auger out, wiping the cable with a rag to keep the mess minimal. The auger head will come out with most of the gunk, so have your bucket underneath to catch it.

Replace the P-trap and turn on the hot water. Allow the water to run for 10 minutes to clear out the drain.

Sinclair plumbing logo

920-406-0937


Terms of Service                       Privacy Policy
For Emergency Plumbing Service call 920-406-0937